Saturday, April 16, 2011

Colored Ice


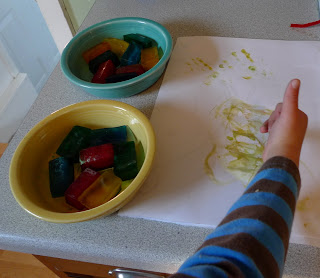
Kids love playing with ice. It's slippery, wet, messy, and in this case colorful - what's not to love? Not only is this a great sensory activity, but it's also a way to explore the states of matter. Materials are in boldface.

For this activity, you start out with regular, colorless ice cubes. Sprinkle salt on the ice, then show kids how to carefully drop food coloring a drop at a time on the ice cubes. Watch as the salt, ice, and color work together to create different textures and color patterns. You can use any kind of salt or a combination of different types. The salt makes the colors appear really vibrant. You could also try this without the salt.

At the end, the kids can use the colored ice to paint pictures. Or just have fun watching the melt into colored puddles!

Questions & concepts:
Did the salt make the ice melt slower or faster?
What happens when colors are mixed together?
What are some ways to speed up or slow down the melting process?
Talk about how water can be a solid or a liquid.
Talk about the ways in which water changes state (freezing & melting).
Posted by Picasa

Chalk Obstacle Courses


Chalk obstacle courses are a fun and easy way to get moving in the springtime. Get creative - draw circles to hop in, loops to run around, lines to jump over. N liked adding his own features and making up new rules as he went along. You can also get creative by adding objects to jump over, hula hoops to jump into, or whatever else you might find lying around.

Tuesday, December 28, 2010

Recycling Bin Castle


N is fascinated with fairy tales, princesses, knights, and castles. I thought it would be neat to make a castle out of recyclables, which we always have on hand (much to DH's chagrin). Finally, one long winter afternoon, inspiration hit and I did a google search to get further ideas. The Family Fun website had some great ideas for a castle made of boxes. http://familyfun.go.com/crafts/the-great-cardboard-castle-668698/
Some of the ideas we copied directly and others we improvised. Once we got going, it really took very little time. We attached the parts with masking tape, and so far it's held up after almost a year of frequent use. Once it was put together N painted it grey with acrylic paint. Then I cut a small rectangle out of a sponge, and N went to town painting on darker grey bricks to make it look a little more castle-like.

Some of my favorite features are the dixie cup and egg carton balconies, the toilet paper tube turrets, and the drawbridge. The drawbridge is definitely N's favorite feature. To make the drawbridge stand out, I twisted up newspaper into a snake and taped it around the opening. It gives the effect of stone.

Once we had a castle, dolls were needed. I bought a set of Melissa & Doug Royal Family Dolls before realizing I really could have just used Playmobil figures. Any small figures would work: Little People, Imaginext, even action figures. Later on I bought a dragon at Michael's and a small witch doll, which have added to the fun.

The castle has a permanent spot in an out-of-the-way spot in our living room, and it gets played with several times a week, if not daily.

Materials:
shoebox
pasta box
2 cans
2 metal tea cannisters
2 toilet paper tubes
herbal tea box
egg carton
1 sheet of newspaper
grey acrylic paint
black acrylic paint
masking tape
Posted by Picasa